AI Image Editor
The AI Image Editor is in early alpha. Tools, models, and panels change often.
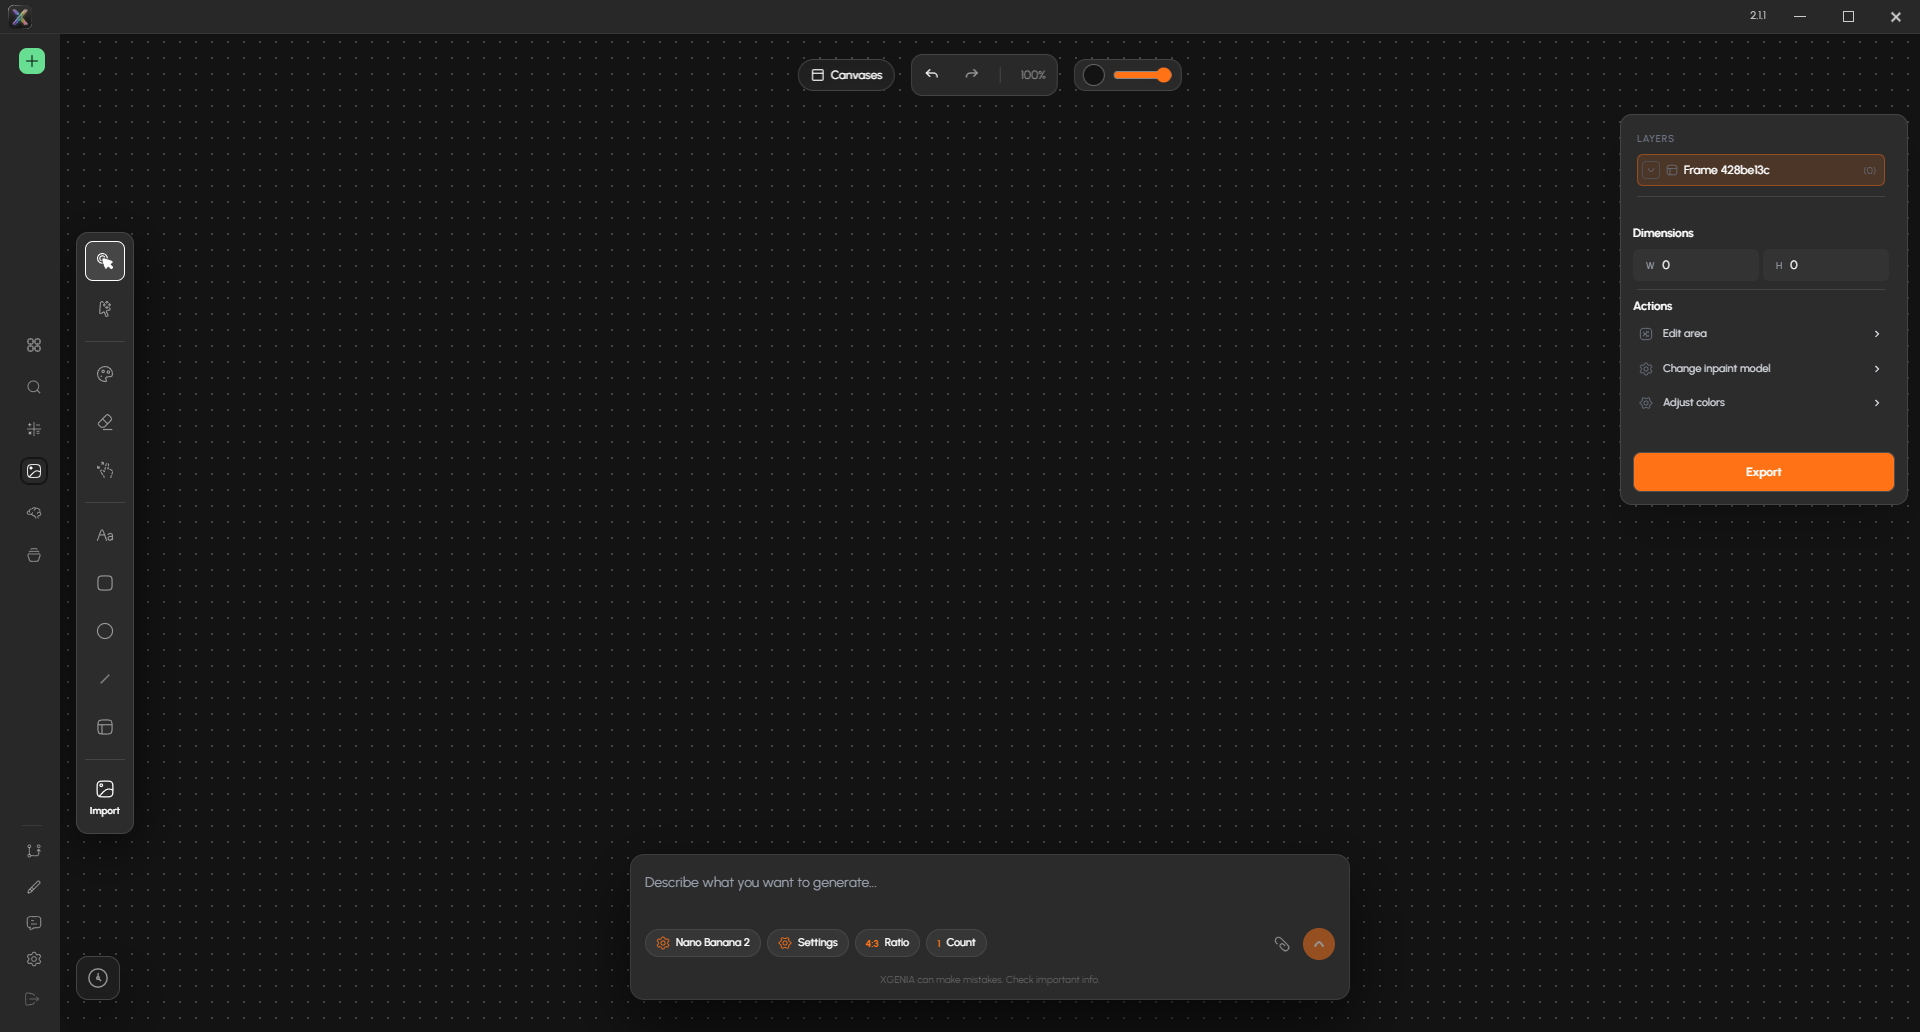
The AI Image Editor is a canvas for making the art your project needs — key art, icons, sprites, backgrounds, textures — without leaving XGENIA. It sits in the editor's left rail, one icon above AI Agents.
It is a real layered canvas with brushes, shapes and text, plus a generation bar along the bottom. You prompt, you paint, or you do both on the same image.
Which of those you use is up to you. The AI route — prompting, masking a region, one-click upscale and background removal — covers the whole job on its own and needs no art skill. The drawing tools are an option on top: use them if correcting something by hand is faster than describing it, or if you are an artist and would rather paint. Neither route is a fallback for the other.
When to use it instead of AI Agents
| Use | For |
|---|---|
| AI Image Editor | Making and refining a single image by hand and by prompt — masking a region, retouching part of it, trying ten variations, exporting the result |
| AI Agents | Generating assets as part of a build — "make a coin icon and put it in the HUD" — where the AI places the result into your project for you |
They share nothing but the goal. The Image Editor gives you the controls; AI Agents does it for you.
The layout
Canvas — the working area, dotted grid, pan and zoom.
Top bar — the Canvases switcher, Undo / Redo, the zoom level, a Toggle Black/White swatch and a Canvas Opacity slider.
Left toolbar — drawing and selection tools, each with a keyboard shortcut.
Right panel — Layers, Dimensions, Actions, and Export. The Actions list grows once a layer with an image in it is selected.
Bottom bar — the generation prompt and its settings.
The toolbar
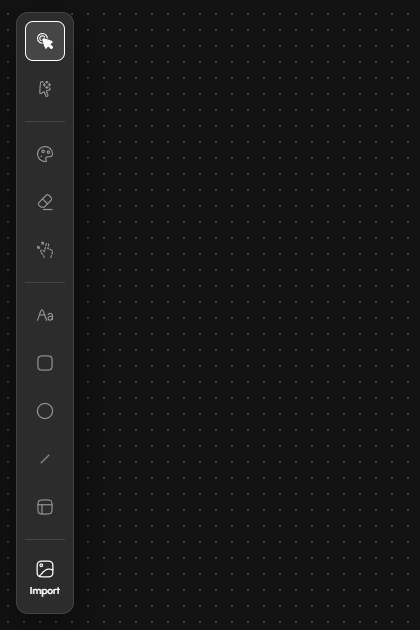
| Tool | Key | What it does |
|---|---|---|
| Select & Multi-select | V | Pick and move layers; shift-click for several |
| Hand Tool | H (or hold Space) | Pan the canvas |
| Paint Brush | B | Paint — also how you mask a region for inpainting |
| Eraser | E | Erase |
| Marquee Select | M | Rectangular selection |
| Add Text | T | Place a text layer |
| Rectangle | R | Draw a rectangle |
| Ellipse | O | Draw an ellipse |
| Line | L | Draw a line |
| Frame | F | Frame placeholder |
| Import Image | I | Open Select Project Image — a grid of your project's own assets — and drop one onto the canvas |
Beyond the tools, a few keys and gestures apply everywhere:
| Key / gesture | Action |
|---|---|
| Delete / Backspace | Delete the selection |
| Ctrl+Z / Ctrl+Shift+Z | Undo / redo — up to 50 canvas steps |
| Shift+click | Add to the selection |
| Scroll wheel | Zoom |
| Middle-click drag, or the Hand tool | Pan |
Shortcuts are ignored while you are typing in a text field.
When something will not work
| Problem | What to check |
|---|---|
| Generation fails | Your Fal.ai key, on the AI Settings Tools & Integrations tab |
| No models listed | The key is valid and you are online |
| Generation is slow | Normal for video and audio; it also varies with server load |
| Masking does nothing | An image must be selected, with the Brush or Marquee tool active |
| Export is greyed out | Nothing is selected — pick an item or a frame first |
| Inpainting results are poor | Try a different model under Change inpaint model |
Learn the shortcuts if you intend to draw. If you do not, the only ones that matter are Import (I) to bring in an asset and Paint Brush (B) for marking a mask — everything else in the refine loop happens through the prompt bar and the Actions list.
Where to go next
| Guide | What it covers |
|---|---|
| Generating Images | The prompt bar, aspect ratio, count, web search |
| Editing & Layers | Importing project assets, masking, upscaling, background removal, splitting an image into objects, and the paint engine |
| Export to PSD | Split a flat image into named objects and export a layered Photoshop file |
| Model Hub | Choosing among hundreds of image, video and audio models |
| Canvases & History | Multiple canvases, Git sync, generation history |