Editing & Layers
The AI Image Editor is in early alpha. Panels change often.
The right-hand panel is where an image stops being a generation and becomes an asset.
Import — pulling in a project asset
Import Image (I) is not a file picker. It opens Select Project Image: a grid of the images that already live in your XGENIA project.
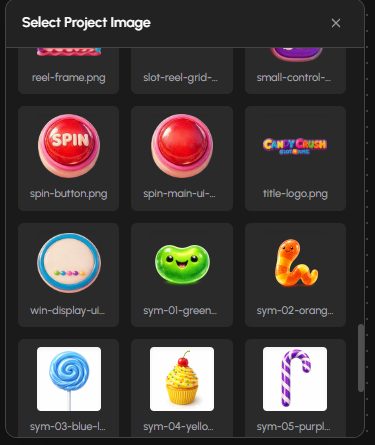
Your generated art, your reference images, your sprite sheets — spin-button.png, title-logo.png, sym-01-green… — all thumbnailed by filename. Pick one and it lands on the canvas as a layer.
That is the point: the Image Editor works on your project's assets, not on files you shuffle through a folder. Fixing an icon that is already in your game is two clicks, not an export-edit-reimport round trip.
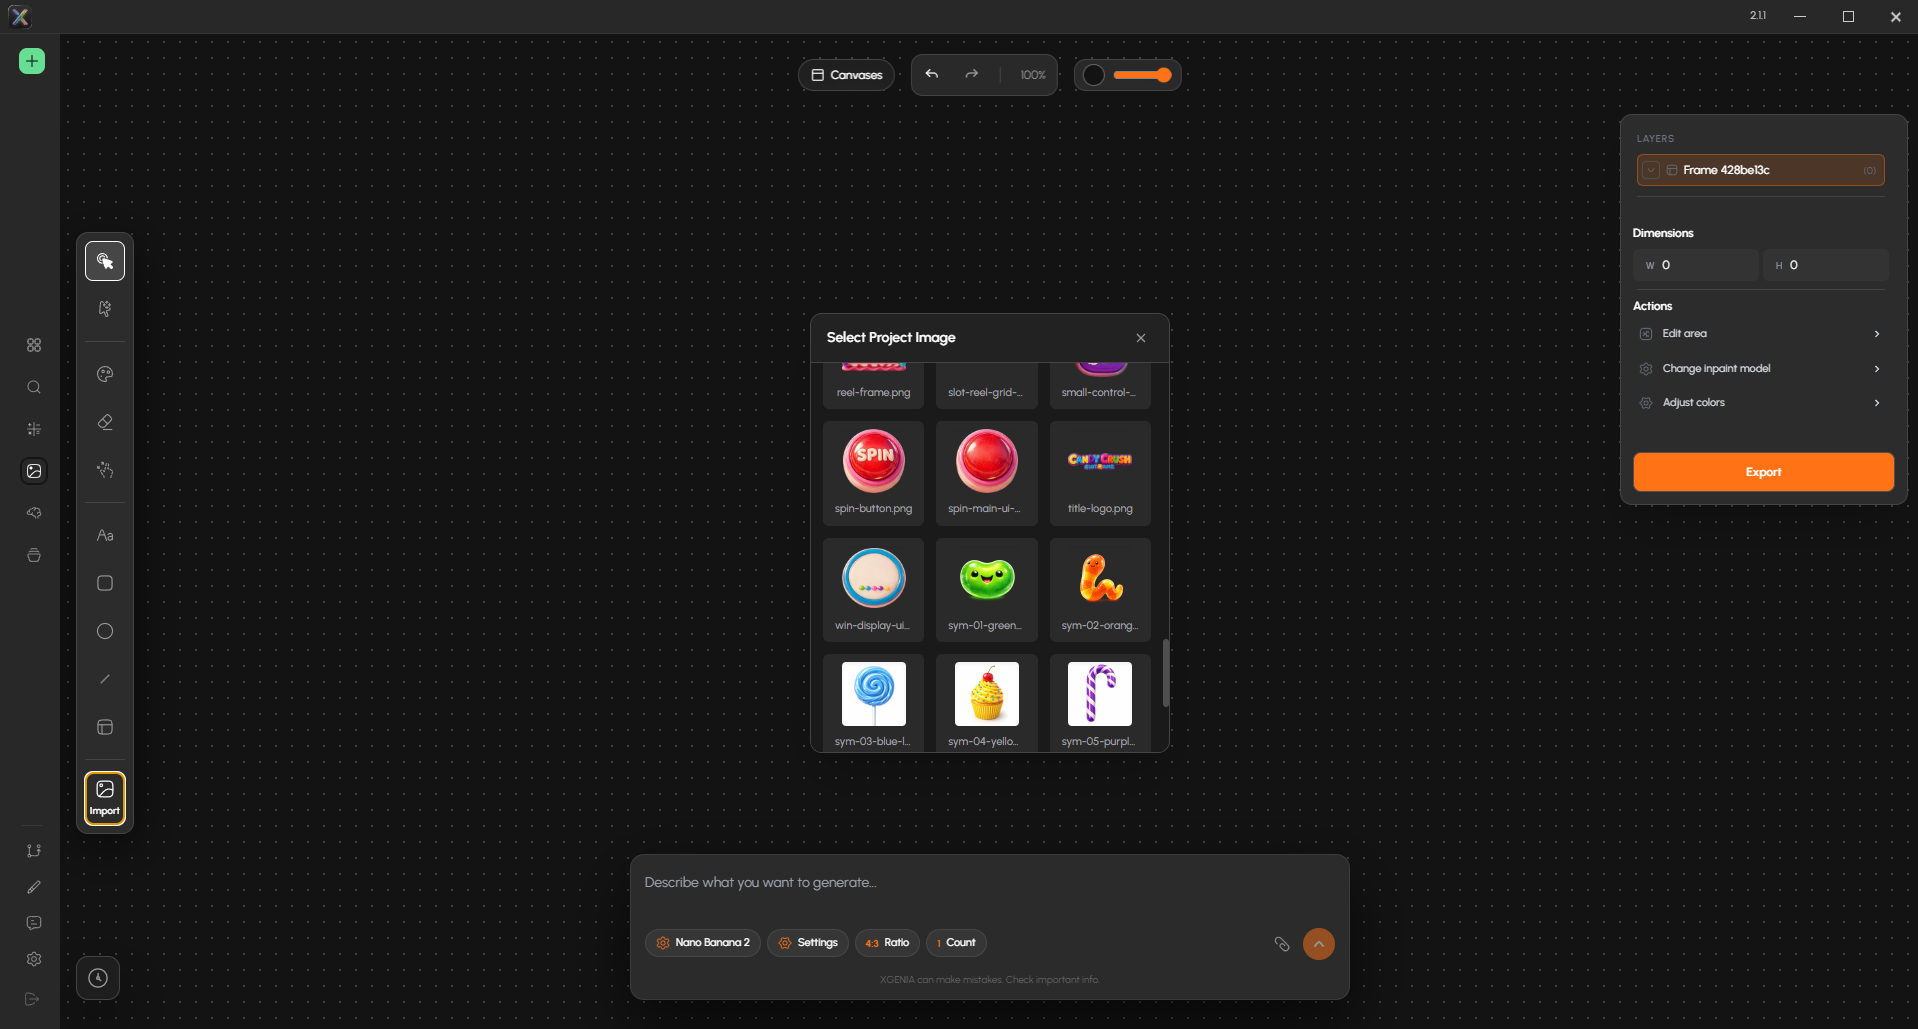
The imported image also attaches itself to the prompt bar as a reference thumbnail (with an × to drop it), so your next prompt can generate from it rather than from nothing.
Layers
Every element on the canvas is a layer — imported images, generated results, shapes, text, brush strokes. The LAYERS list shows them by name with a child count, and each has an expand arrow and a visibility toggle.
Layers are ordered bottom to top: the ones higher in the list draw over the ones below. Click one to select it; everything below the list then applies to that selection.
| Action | What it does |
|---|---|
| Move up / Move down | Change the stacking order |
| Drag | Reorder by hand in the list |
| Group | With two or more selected, bind them so they move and transform together |
| Ungroup | Separate a grouped set |
| Merge layers | Flatten the selected layers into one image (images only) |
| Explode | Split a grouped item back into separate layers |
Group before you move a set of related pieces; merge only when you are sure, since it is not reversible the way grouping is.
Frames
Frames are separate design areas on the same canvas — use Add frame in the top toolbar to make one. Each frame holds its own layers, and frames can nest.
Use them to keep variants side by side: three takes on the same icon, or the same screen at two aspect ratios, all visible at once without separate canvases.
Dimensions
W and H for the selected layer. Set them explicitly when an asset has to match a slot in your UI — an icon that must be exactly 512×512 is a number you type, not a ratio you eyeball.
Actions
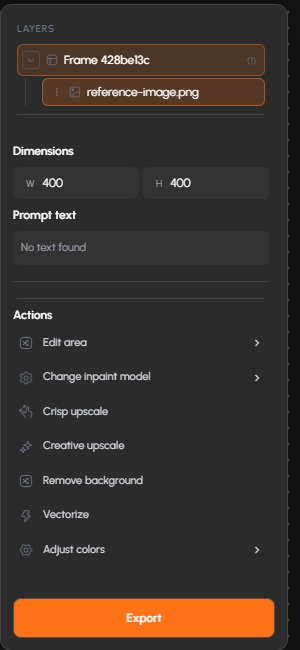
The Actions list changes with what you have selected. On an empty frame you get three entries; select a layer with an actual image in it and you get seven.
| Action | What it does |
|---|---|
| Edit area | Mask a region for inpainting — see below |
| Change inpaint model | Pick the model used for masked edits, separately from your generation model |
| Crisp upscale | Increase resolution while staying faithful to the original |
| Creative upscale | Increase resolution while letting the model add detail — changes the image, not just its size |
| Remove background | Cut out the subject. This is how you get an alpha channel out of an image that was generated opaque |
| Vectorize | Raster to vector |
| Adjust colors | Colour correction on the layer |
Two of these deserve a note.
Crisp vs Creative upscale is a real choice, not a quality slider. Crisp keeps what is there; Creative invents plausible detail. For a logo or UI asset you almost always want Crisp — Creative will happily redraw your lettering.
Remove background is the rescue hatch for the transparency problem. If you generated a great icon on an opaque model, you do not have to regenerate it on a transparent one — cut the background here instead.
A Prompt text field also appears above Actions, reporting any text the editor could read out of the selected image (or No text found).
Edit area

Masking. Choose a Selection tool — three modes are offered — and mark the region you want the model to change. Hold ⌥ (Alt) to exclude from selection, so you can carve a hole in a mask rather than starting over.
Clear mask wipes the selection; Done applies it.
This is the single most useful feature in the editor. Regenerating a whole image to fix one hand is wasteful and changes everything else; masking the hand and inpainting it changes only the hand.
The Layer editor
Double-click the image on the canvas and it opens full screen in the Layer editor, titled with the filename. Header buttons: Paint, Undo, Save to canvas, and ✕ to leave.
The editor has two modes. It opens in the first one.
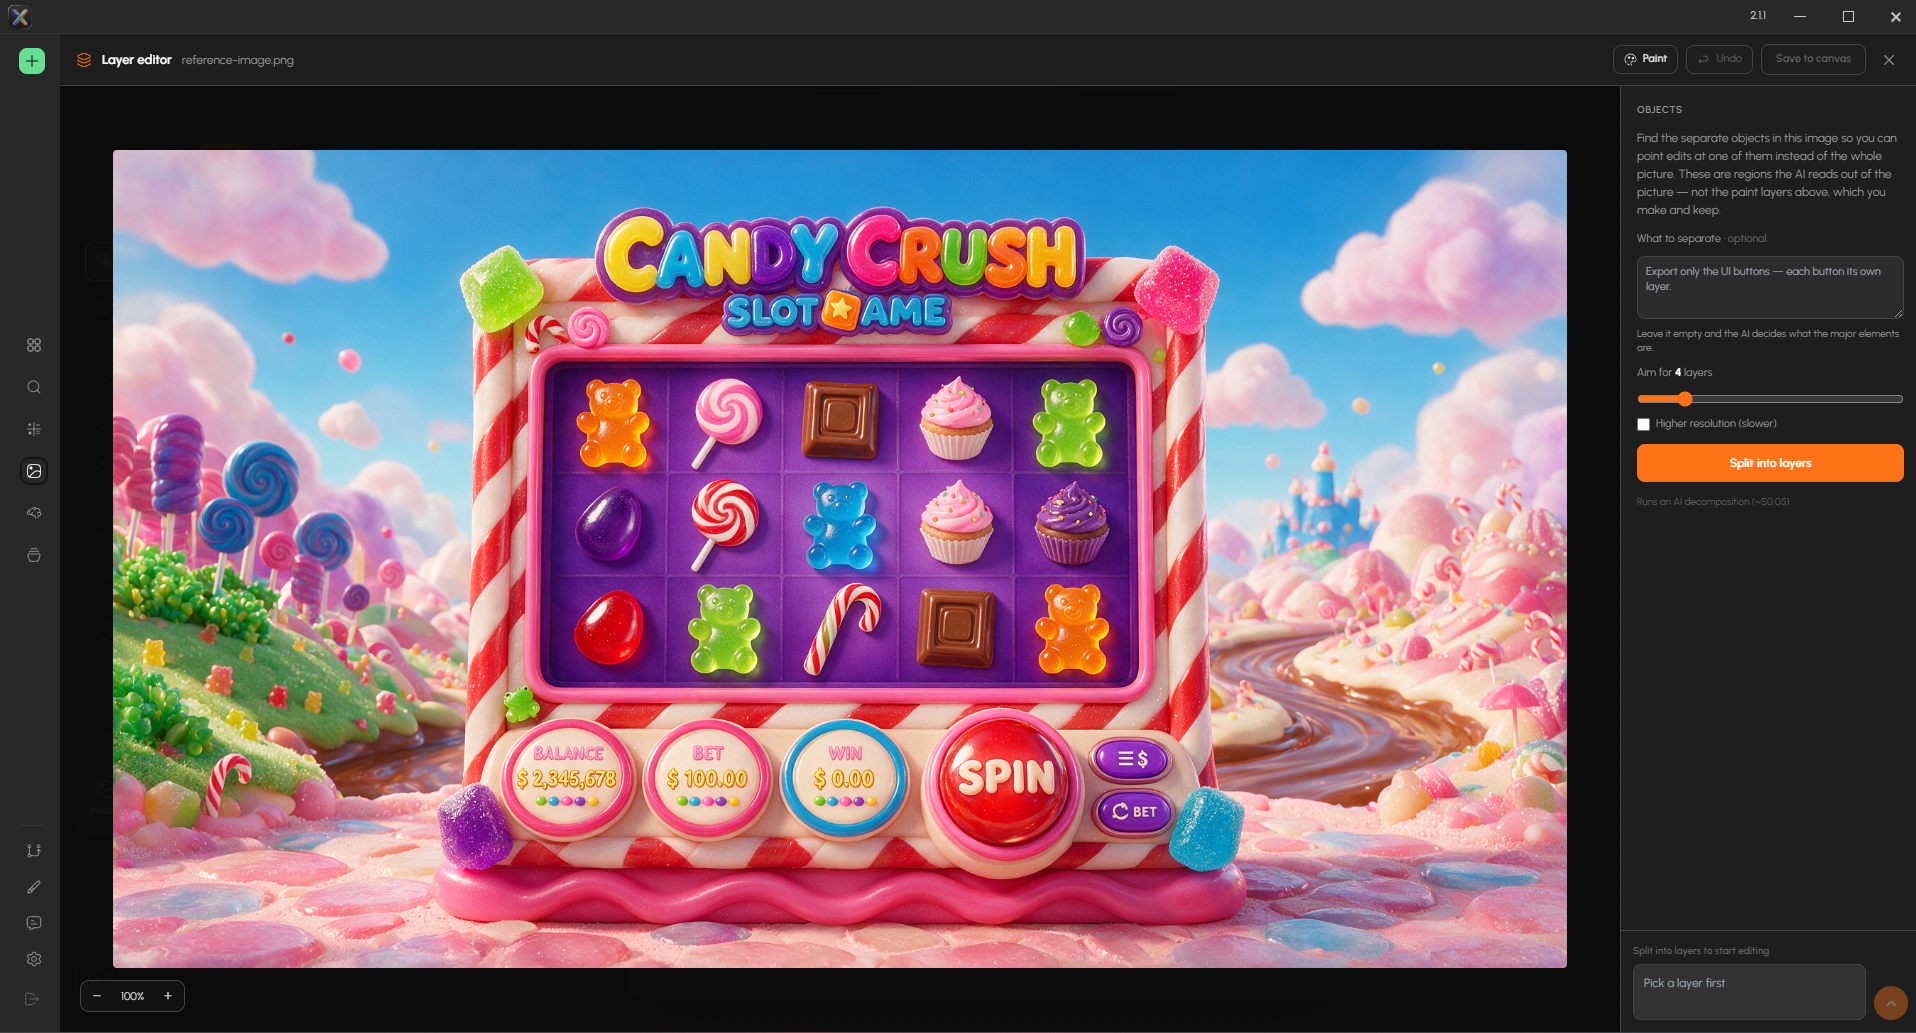
Objects — splitting a flat image into editable regions
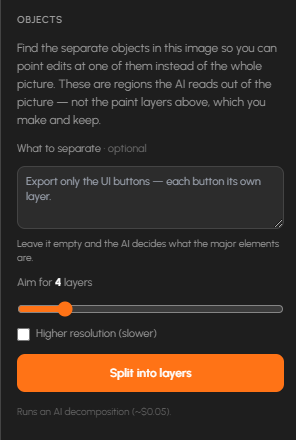
A generated image arrives as one flat picture. OBJECTS runs an AI decomposition over it to find the separate things inside — so you can point an edit at one of them instead of the whole frame.
The panel is careful about a distinction that matters:
These are regions the AI reads out of the picture — not the paint layers above, which you make and keep.
In other words: objects are found, paint layers are authored. They are different stacks.
| Control | What it does |
|---|---|
| What to separate (optional) | Tell it what you are after — "Export only the UI buttons — each button its own layer." Leave it empty and the AI decides what the major elements are. |
| Aim for N layers | How many regions to target |
| Higher resolution (slower) | Better edges, longer wait |
| Split into layers | Runs the decomposition |
The button footnote states the cost up front: runs an AI decomposition (~$0.05). Not free, but far cheaper than regenerating a whole scene because one button was wrong.
One split returns at most 16 pieces — split a region again to go further.
A split is bound to the exact image it was made from. Edit the picture afterwards and the split is dropped and has to be re-run at the same cost, so finish the image first and split last.
Once split, the panel lists every object by a descriptive name with an eye toggle, and offers Export as PSD — the full walkthrough is in Export to PSD.
This is what makes a generated screen workable. A slot UI that came out as a single flat image becomes a spin button, a balance plate, and a reel frame you can move, recolour and export separately.
Paint — a real paint engine
Everything in this section is for working on an image by hand. It exists for artists, and for the moments when correcting something yourself is quicker than describing it. If you are neither painting nor in a hurry, the prompt bar and the Actions above do the same job with no drawing involved.
Click Paint and the right panel switches to three tabs: Brush, Layers, Surface. What is behind them is a genuine paint engine, not a token brush tool — if you can paint, this is worth your time.
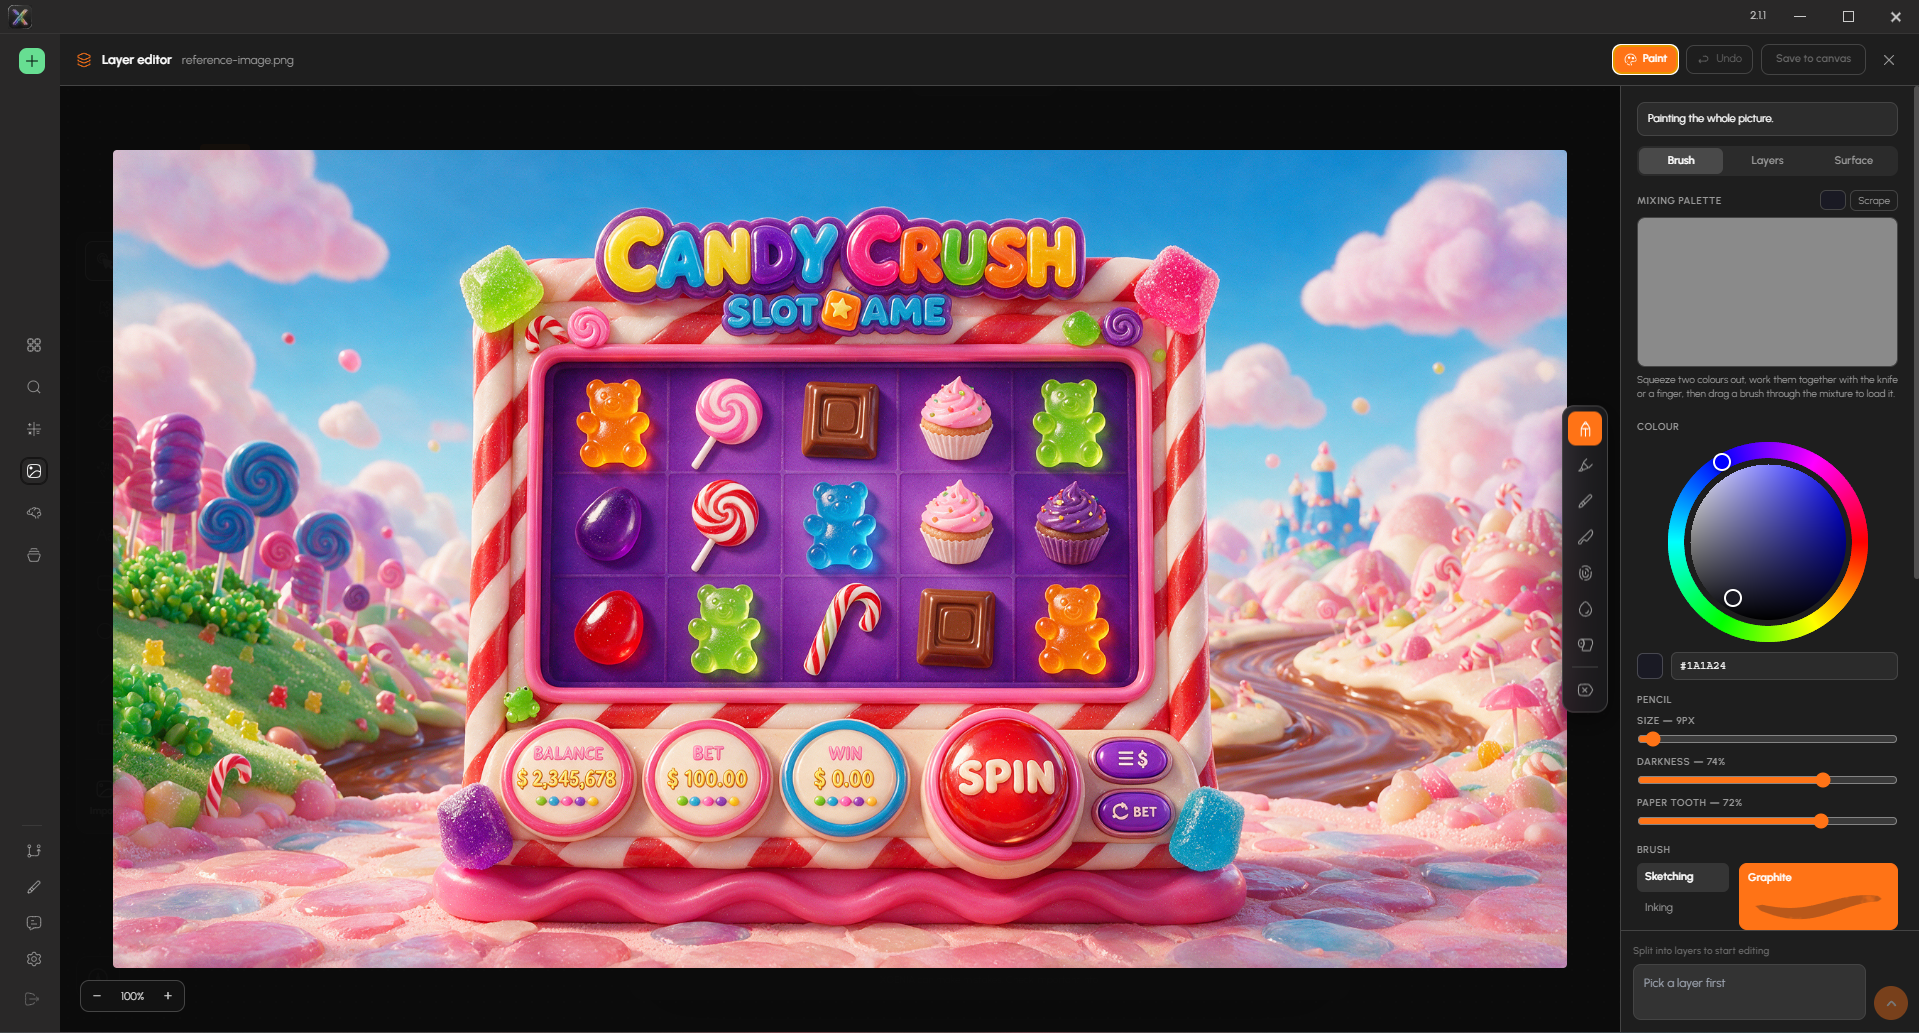
Brush
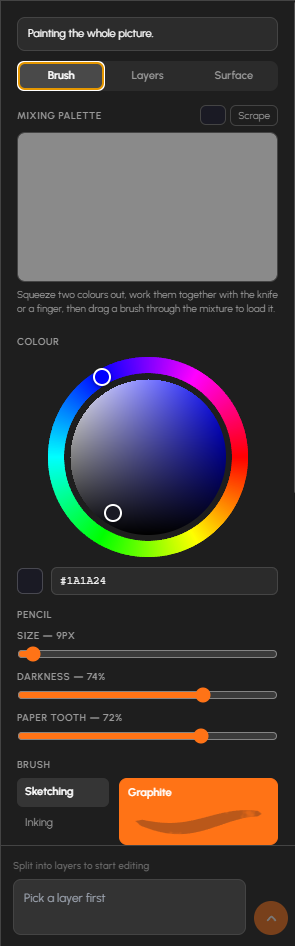
A mixing palette sits at the top, and it behaves like one: "Squeeze two colours out, work them together with the knife or a finger, then drag a brush through the mixture to load it." Scrape clears it.
Below that: a colour wheel with a hex field, a pencil section (size, darkness, paper tooth), and brush families — Sketching, Inking, Drawing, Painting, Watercolour, Charcoal, Airbrushing, Texture — each with named presets such as Graphite, Soft Graphite (6B), Hard Pencil (2H), Blocking Pencil. Then brush size, opacity, flow, hardness, grain and stabiliser.
Layers
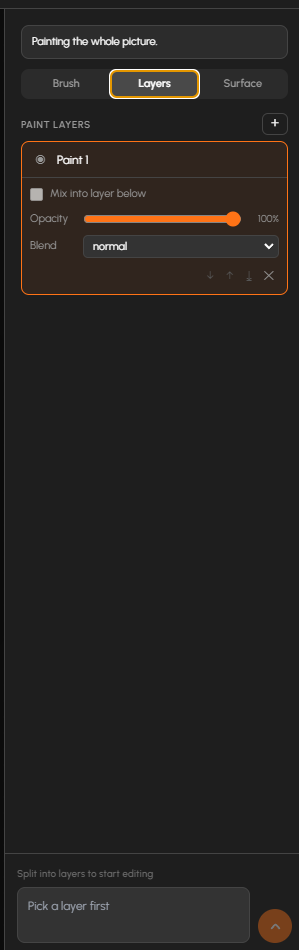
PAINT LAYERS — your own strokes, stacked. + adds one. Each layer carries:
| Control | What it does |
|---|---|
| Mix into layer below | Let this layer's paint blend with the one under it, rather than sitting on top |
| Opacity | Layer opacity |
| Blend | Blend mode — normal and the usual set |
| ↓ ↑ ↓̲ ✕ | Reorder, send down, and delete |
These are the layers you keep — as opposed to the object regions, which are read out of the picture.
Surface
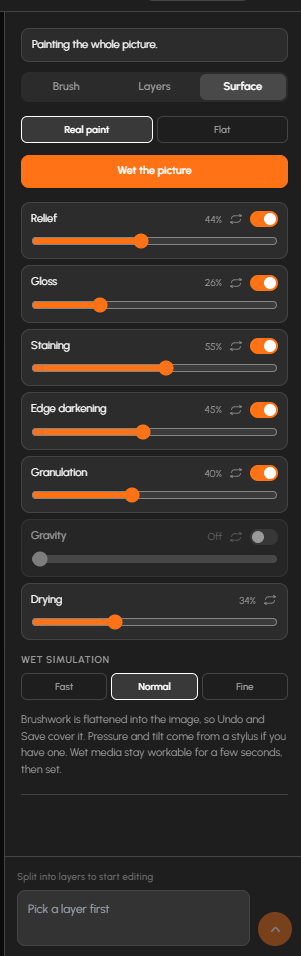
This tab simulates the medium rather than the brush. Switch between Real paint and Flat, press Wet the picture, then tune each property — every one has its own on/off toggle and a reset:
Relief, Gloss, Staining, Edge darkening, Granulation, Gravity, Drying. Wet simulation quality runs Fast / Normal / Fine.
The panel states the trade-offs plainly:
Brushwork is flattened into the image, so Undo and Save cover it. Pressure and tilt come from a stylus if you have one. Wet media stay workable for a few seconds, then set.
Three things follow. Strokes are flattened, so commit deliberately. Wet media set after a few seconds, so blending happens while the paint is live. And closing without Save to canvas discards the brushwork.
Export
The orange Export button takes the selection out of the editor as a file you can bring into your project — PNG, JPG, or SVG for anything you ran through Vectorize.
To export a whole layered breakdown rather than a flat file, see Export to PSD.
A working loop
- Import an asset that already exists in your project, or generate a first pass.
- Look at what is wrong with it.
- Mask just that region with Edit area.
- Prompt again — only the masked area changes.
- Adjust colors to match your project.
- Set Dimensions to the size the asset actually needs.
- Remove background if the asset needs alpha, or Crisp upscale if it needs resolution.
- Export.
Steps 3 and 4 are the loop. Most of the work is deciding what to mask.