Setting Up Supabase Service
What you will learn in this guide
Learn how to create a Supabase project, configure your database schema, and establish the connection to your XGENIA application.
Overview
In this guide, we'll cover:
- Creating a Supabase project and account
- Setting up your database schema
- Supabase setup in XGENIA
- Testing the connection
1. Creating Your Supabase Project
Step 1: Sign up for Supabase
Visit supabase.com to create your free account.
Step 2: Create a New Project
- After signing in to Supabase, click the "New Project" button on your dashboard
- Choose your organization (or create a new one if this is your first project)
- Fill in your project details:
- Name: Give your project a descriptive name
- Database Password: Create a strong password
- Region: Choose the region closest to your users for better performance
- Click "Create new project"
- Wait for Supabase to set up your project (this may take a few minutes)
Step 3: Configure Your Database Schema
- Once your project is ready, navigate to the Table Editor in the left sidebar
- Click "Create a new table" to start building your database structure
- Set up your table:
- Name: Enter a descriptive table name (e.g., "users", "products", "posts")
- Description: Add an optional description for documentation
- Enable or Disable Row Level Security (RLS): Toggle this based on your preference
- RLS is important as it controls who can access your data and what operations they can perform (select, insert, update, delete). You'll need to set up policies later to allow your XGENIA application to interact with this table.
- Add columns to your table:
- Click "Add column" to create new fields
- Define column properties:
- Name: Column identifier
- Type: Data type (text, integer, boolean, timestamp, etc.)
- Default value: Optional default value
- Primary key: Check if this is your primary key
- Nullable: Whether the field can be empty
- Click "Save" to create your table
- Repeat this process for all tables you need in your application
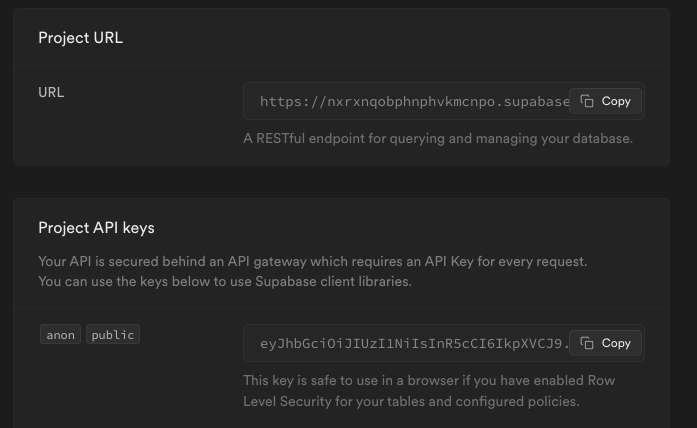
2. Getting Your Supabase Credentials
You'll need two key pieces of information from your Supabase project:
Project URL
Anon Key
3. Supabase setup in XGENIA
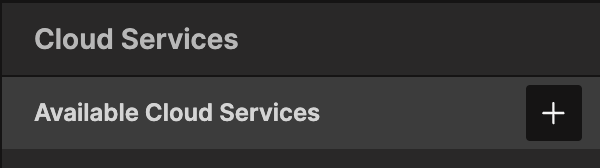
Step 1: Access the Cloud Services Panel
To set up Supabase in your XGENIA project, first navigate to the Cloud Services tab in the left sidebar.

Then click the Plus icon at the top of the sidebar.
Step 2: Select Service Type to Supabase
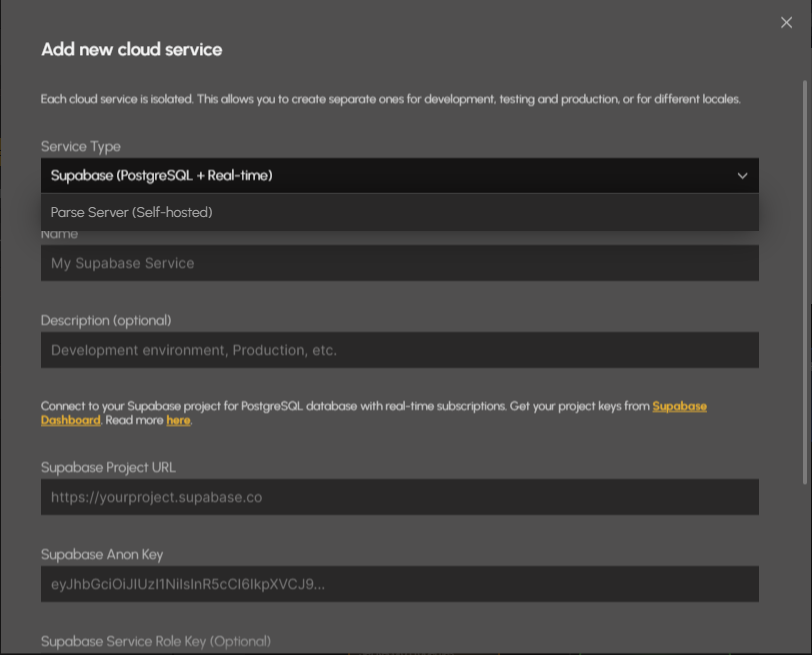
Enter the Supabase credentials you obtained earlier (Project URL and Anon Key). After setting up your credentials, click the "Create Supabase Service" button.
Step 3: Select Active Cloud Service
Once your Supabase service is created, you need to select it as the active cloud service for your project. In the sidebar, click "Use in editor".
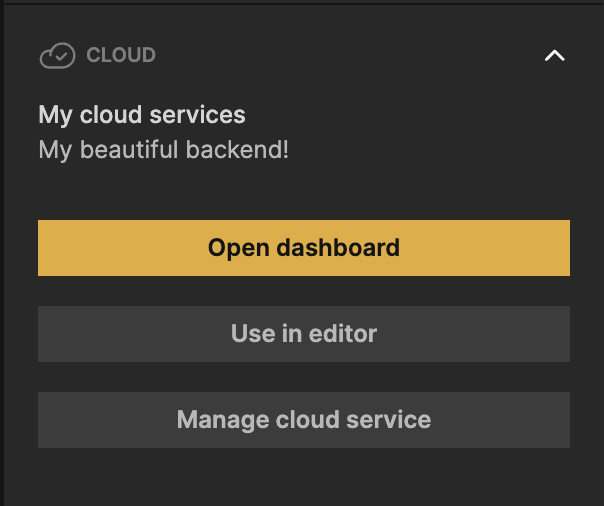
This means that any data requests from your XGENIA application will use this Supabase cloud service.
Step 4: Your Supabase Service is Ready to Use
Congratulations! Your Supabase service is now successfully connected to your XGENIA project. You can now start creating records, querying data, and building powerful applications with your Supabase database.
Note: If you encounter that your Supabase service is not activated, you can activate it from the Manage Cloud Service by clicking the "Activate Integration" button.

Next Steps
Once your Supabase service is connected, you're ready to start working with data:
- Creating Records - Learn how to add new data to your database
- Querying Records - Fetch and display data from your database
- Updating Records - Modify existing data