Supabase Multi-Environment Setup Guide
This guide will walk you through setting up Supabase with multiple working environments (development/testing and production) for your XGENIA project. This approach ensures that your development work doesn't affect production data and allows you to test changes safely.
Table of Contents
- Overview
- Prerequisites
- Step 1: Create Supabase Projects
- Step 2: Get Your Project Credentials
- Step 3: Configuring Multiple Cloud Services in XGENIA
Overview
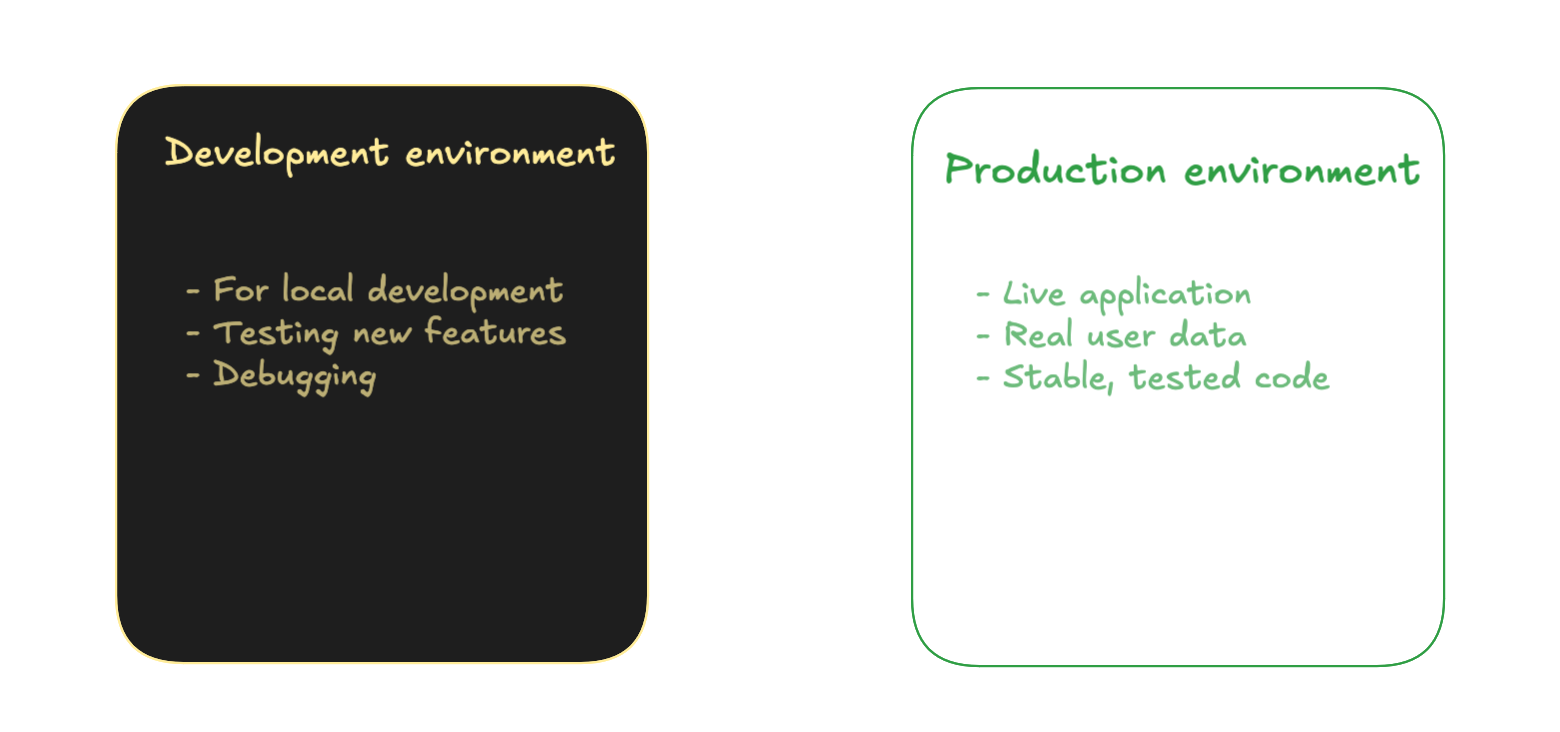
When working with cloud services like Supabase, it's essential to separate your development and production environments. This separation provides:
- Safety: Testing changes without affecting production data
- Isolation: Development bugs won't impact real users
- Flexibility: Different configurations for different environments
- Compliance: Easier to meet security and data protection requirements
Environment Structure
Prerequisites
Before starting, ensure you have:
- A Supabase account (sign up here if needed)
- Access to your project's codebase
- Basic understanding of environment variables
- Your project's root directory accessible
Step 1: Create Supabase Projects
You'll need to create separate Supabase projects for each environment.
1.1 Create Development Project
- Log in to your Supabase Dashboard
- Click "New Project" in the top right corner.

- Fill in the project details:
- Organization: select an organization (if there are any), under which you want this project to be.
- Database Password: create a strong password and save it securely
- Region: choose a region close to you for development
- PSecurity: leave the default select as they are.
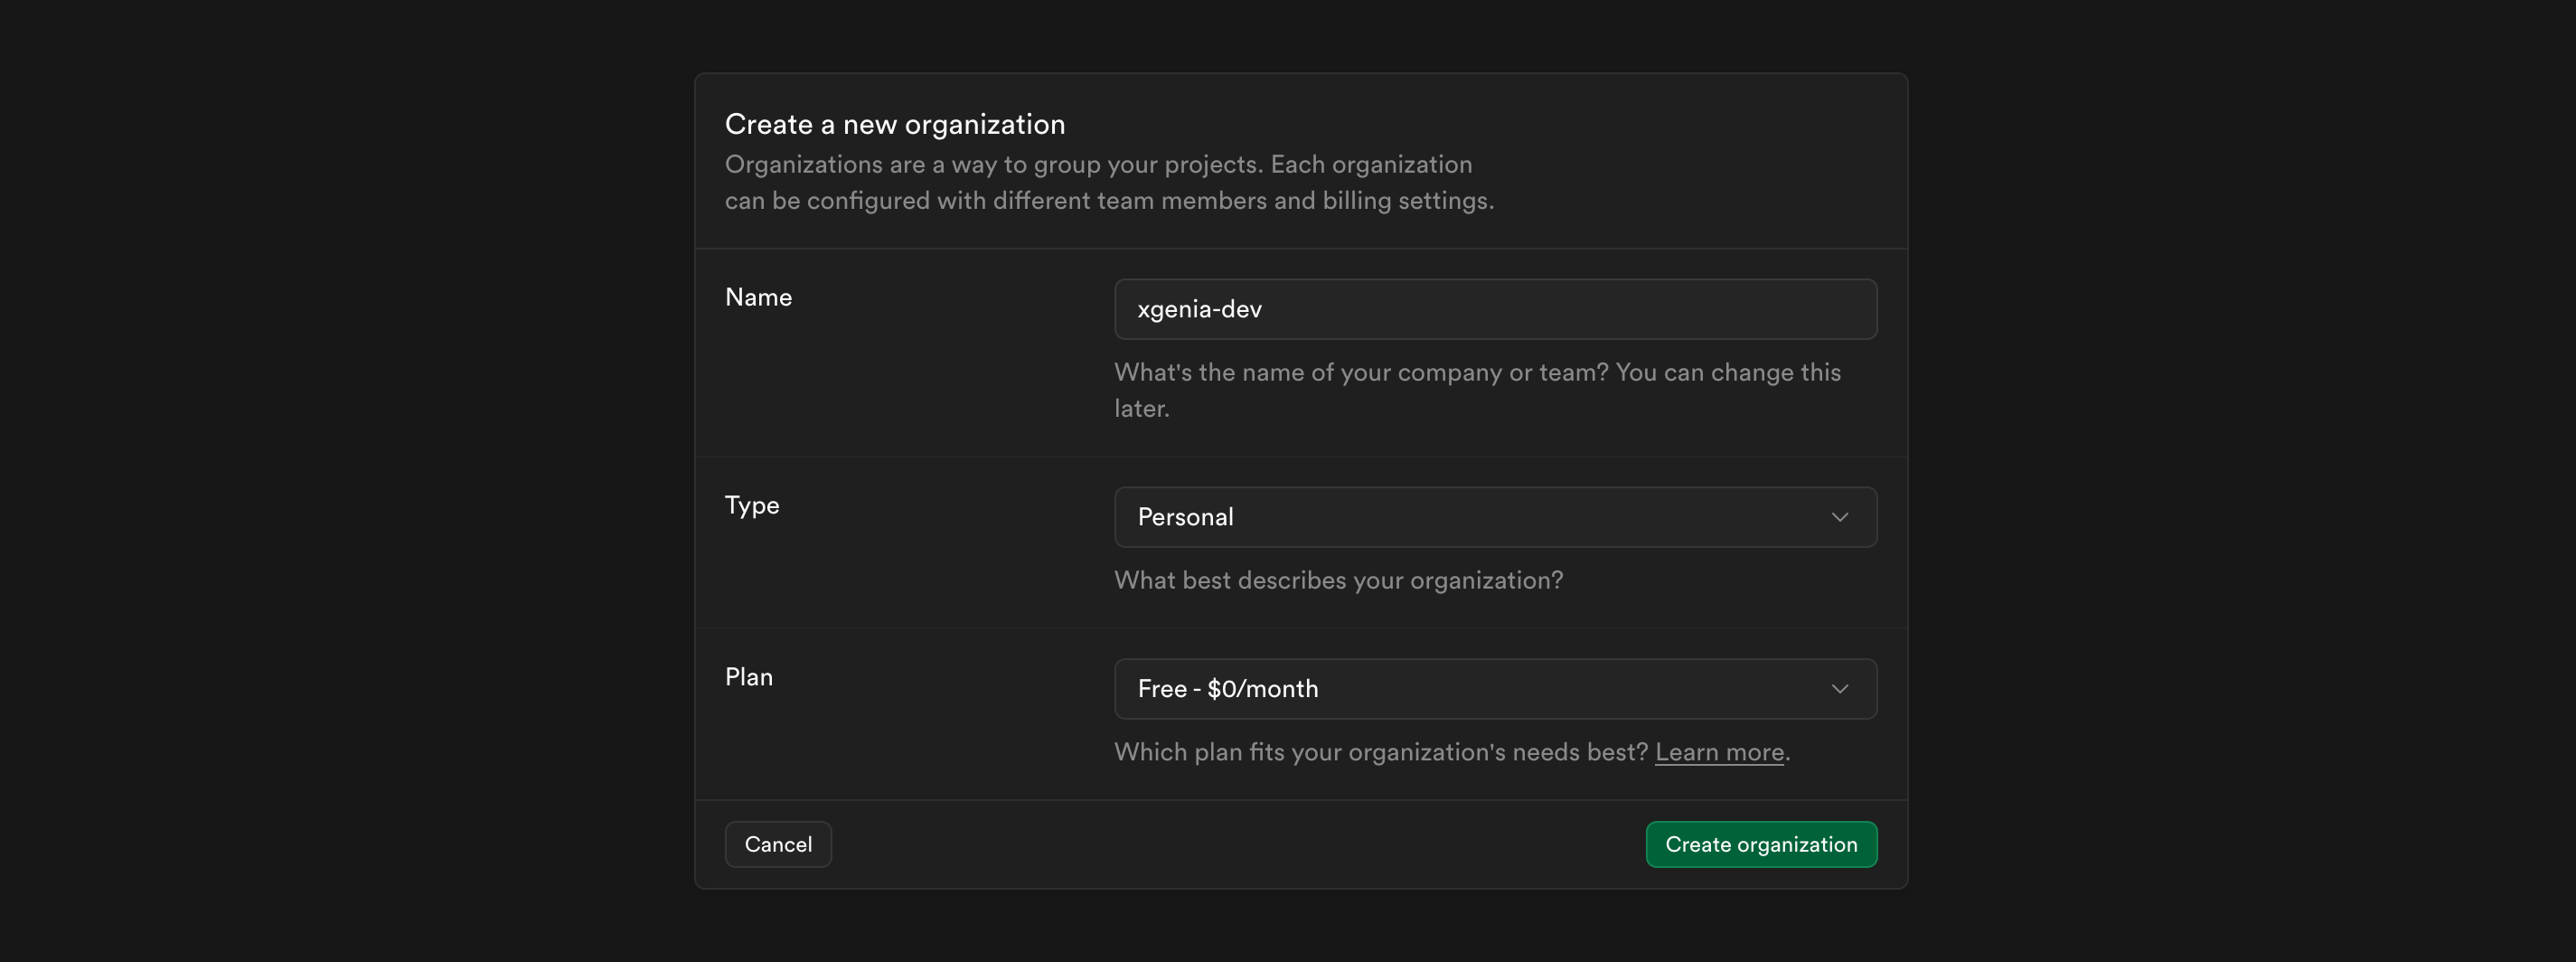
- Click "Create new project" and wait a few moments for setup to complete
1.2 Create Production Project
Repeat the same process for your production environment as well:
- Click "New Project" again
- Fill in the project details (just like you did when creating the dev environment)
1.3 Organize Your Projects
Consider organizing your projects in Supabase:
- Use consistent naming:
project-name-dev,project-name-prod - Add project descriptions in the dashboard
- Use tags or folders if available in your Supabase organization
Step 2: Get Your Project Credentials
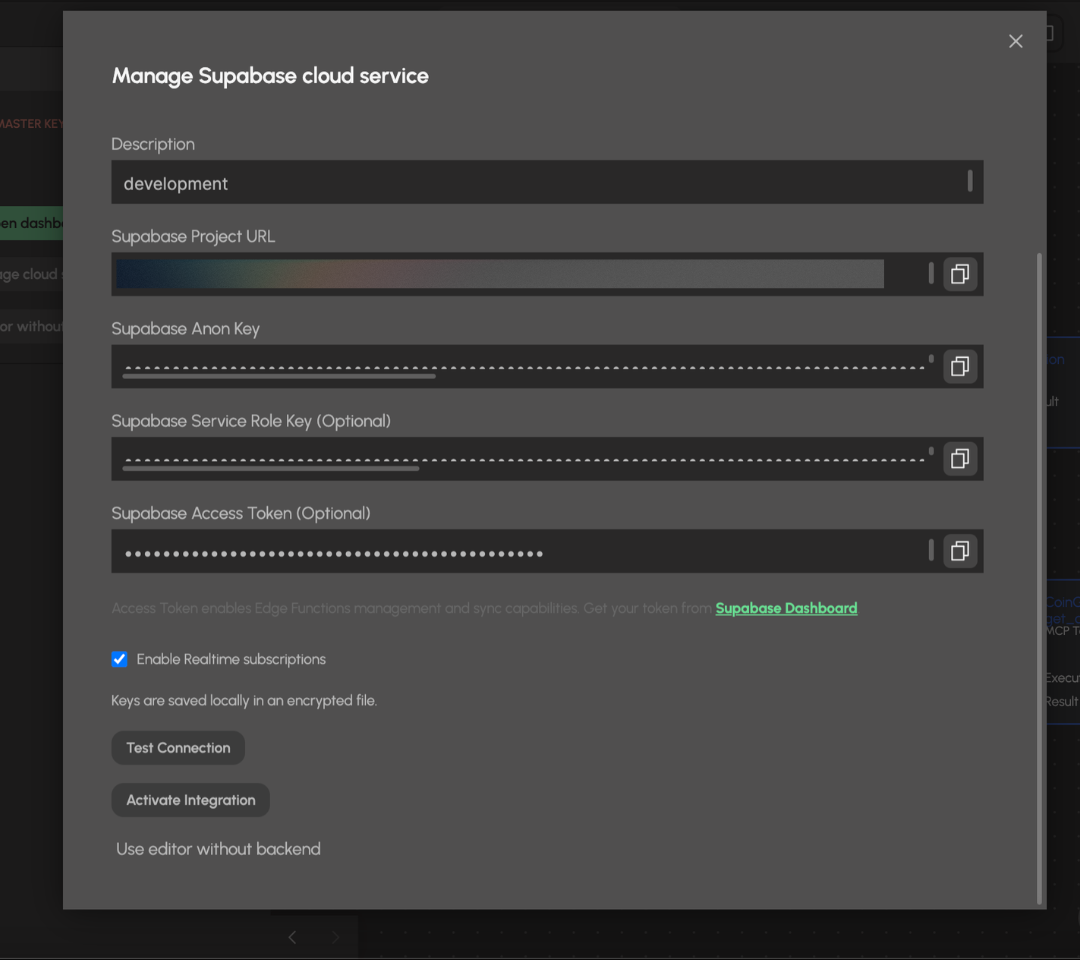
For each project, you'll need to retrieve credentials such as your supabase project URL, anon key and PAT (personal access token). Although, an optional field, you can fill in the Supabase Service Role key, especially if you intend to work with authenticated database operations.
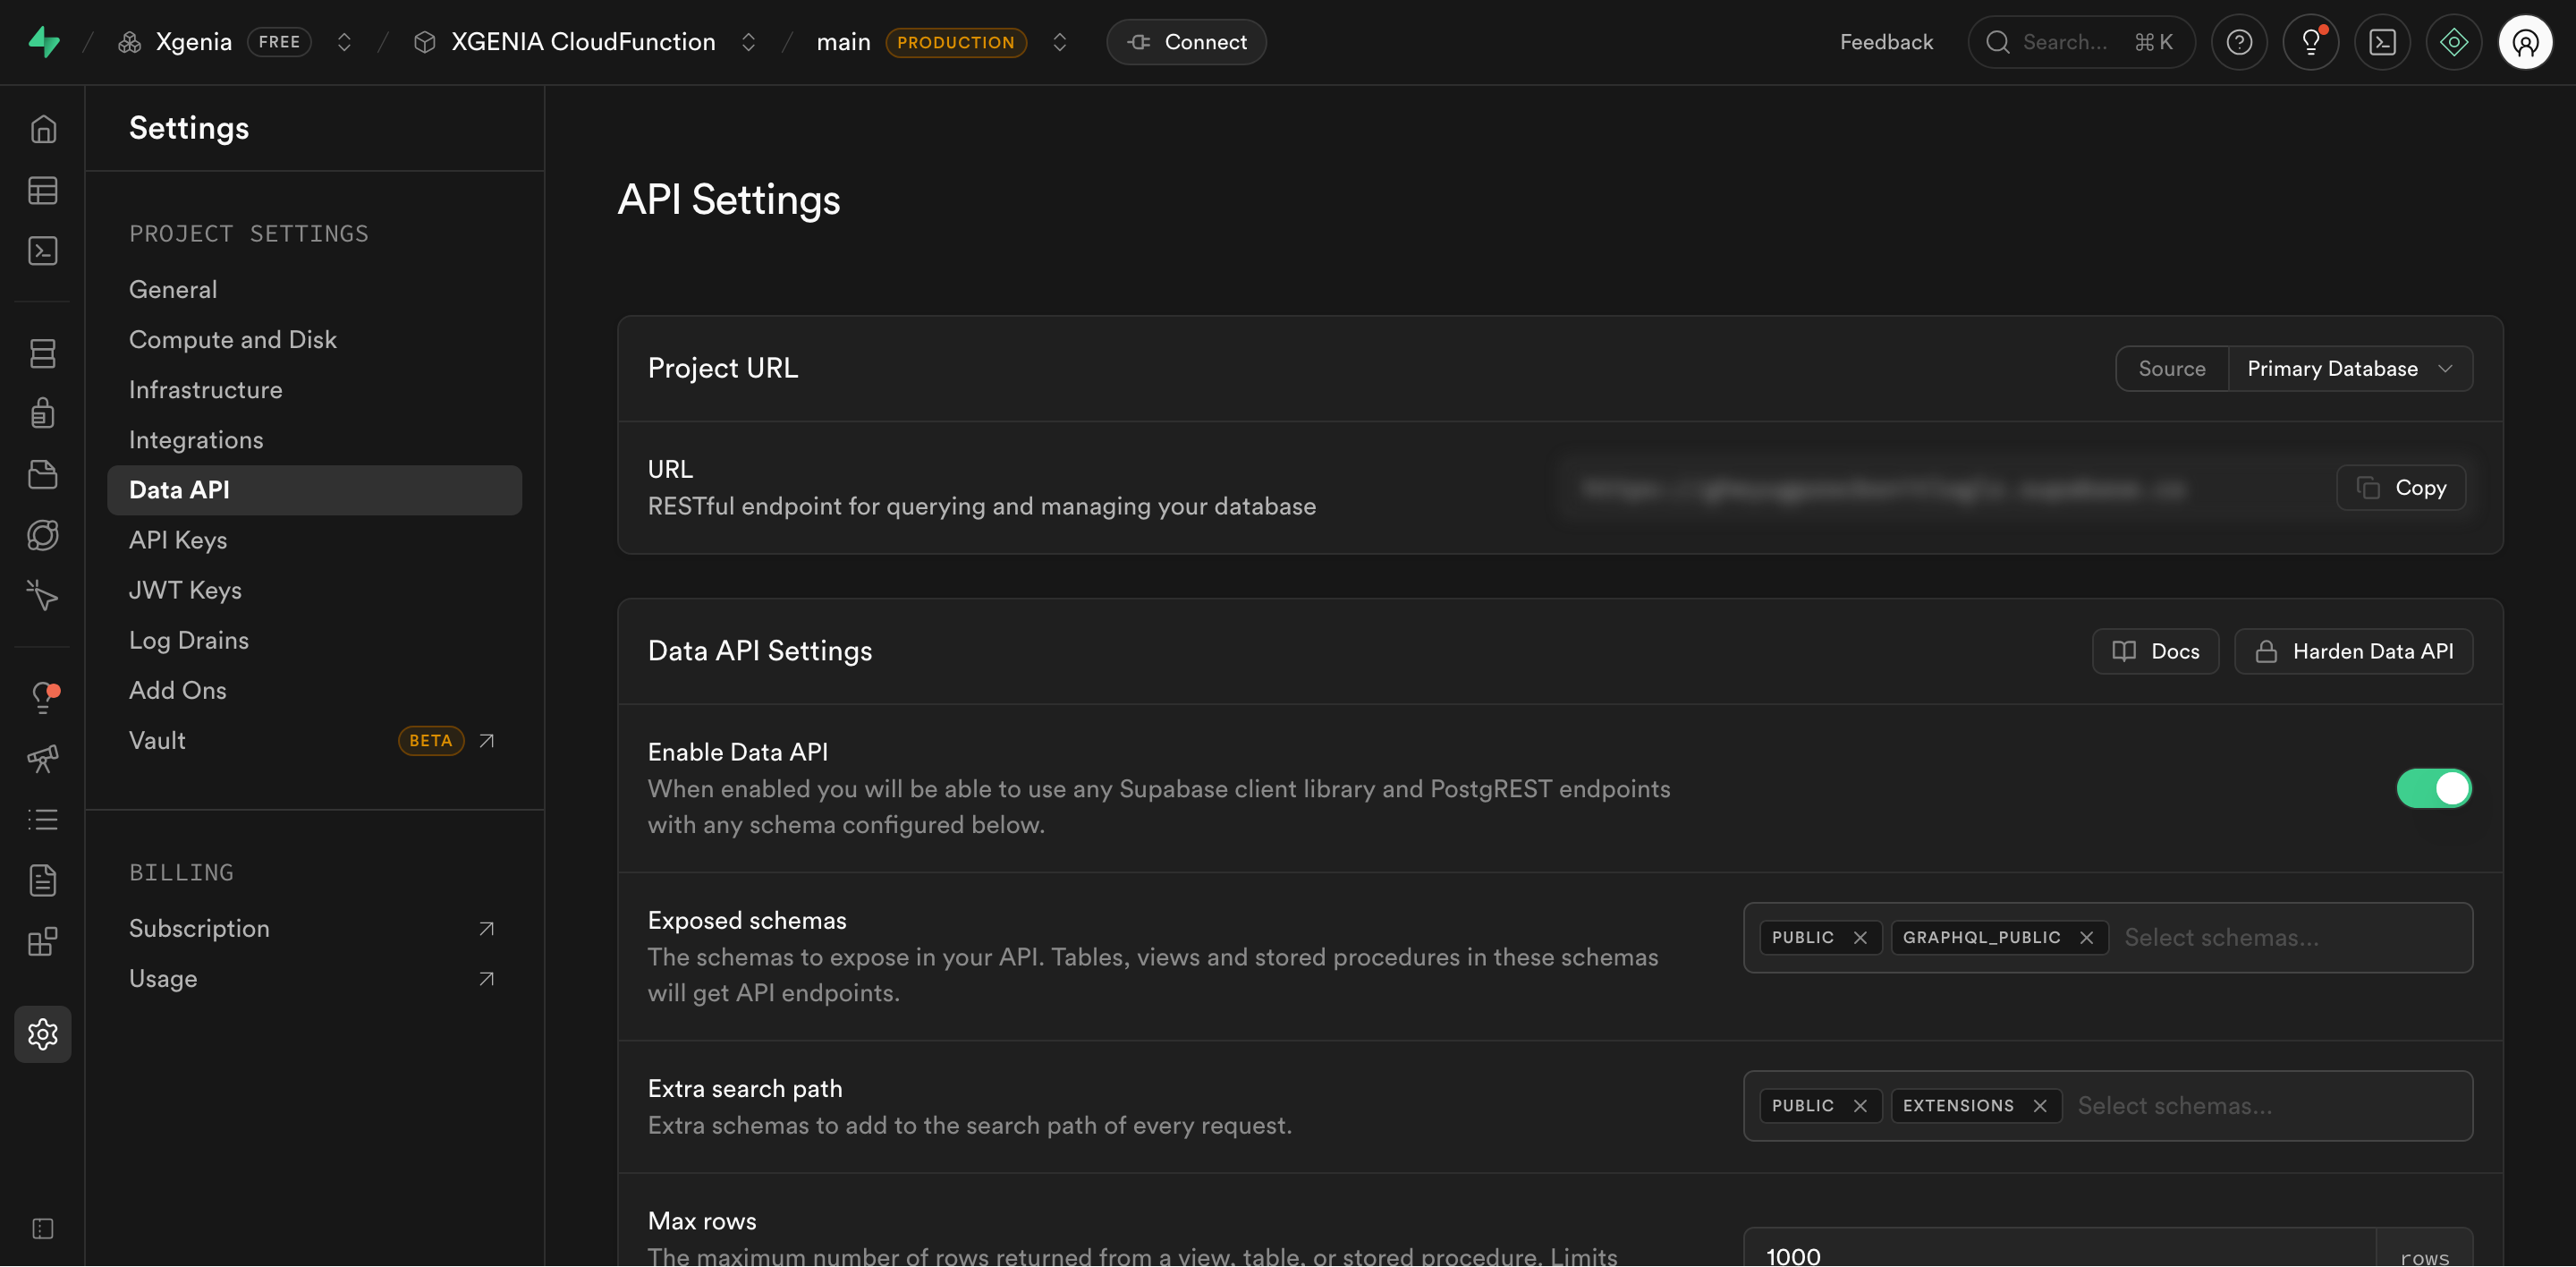
2.1 Access Project URL
- Select your development project from the dashboard
- Navigate to Project Settings → Data API in the left sidebar. You will see the project url in the form of
https://xxxxx.supabase.co
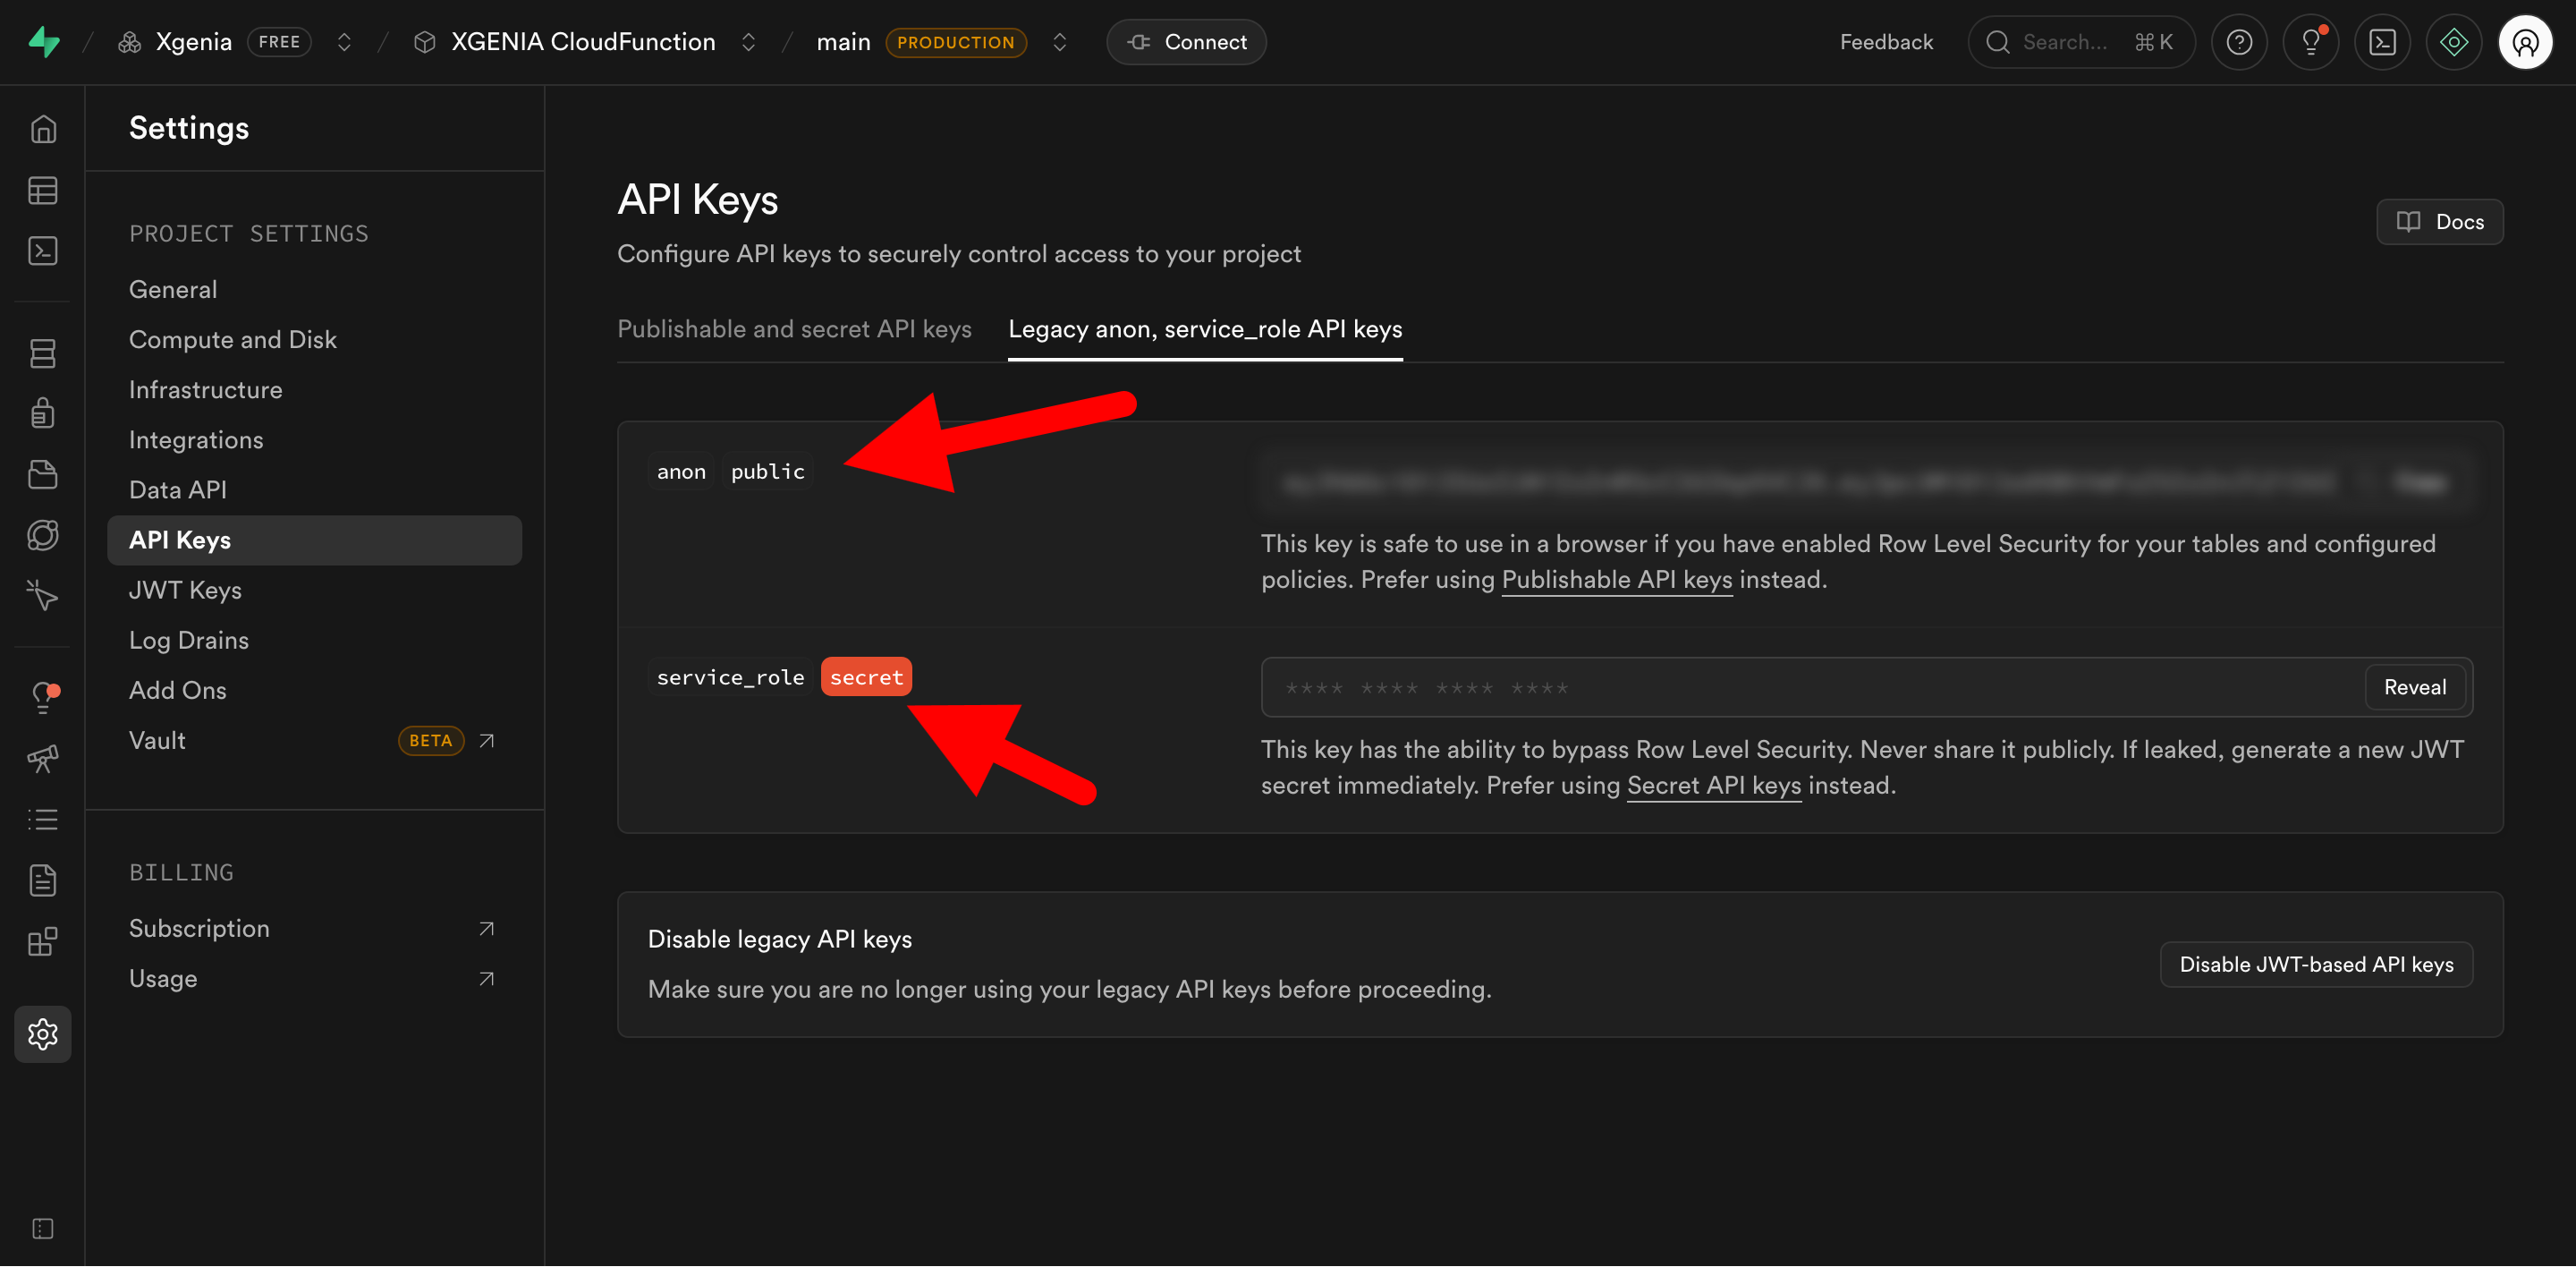
2.2 Get the anon key and service role key
While you are on the project settings, in the left sidebar, you will see API Keys. Click on it and head to the Legacy anon, service_role API keys tab.
You'll see two important values:
- Anon/public key: A long JWT token starting with
eyJ... - Service role key
2.3 Get your personal access token (PAT) from your supabase profile
Navigate to your profile by clicking the profile icon at the top right of the supabase dashboard
Profile icon (top right corner) → Account Preferences → Access tokens in the left sidebar. From there, click on the Generate new token and you will be able to create a new token with or without an expiry date for your access token. Its preferred that you set an expiry token and renew upon expiration for security reasons.
Important: Copy these values and keep them secure. You'll need them for setting up your cloud service
2.3 Copy Production Credentials
Follow the same step and get your supabase production level credentials. Copy and save them securely in a place safe for reference at a later point (where we will these details in XGENIA)
Step 3: Configuring Multiple Cloud Services in XGENIA
XGENIA supports multiple cloud services per project (for example, Development and Production).
Create a new cloud service xgenia
- Open your project in XGENIA.
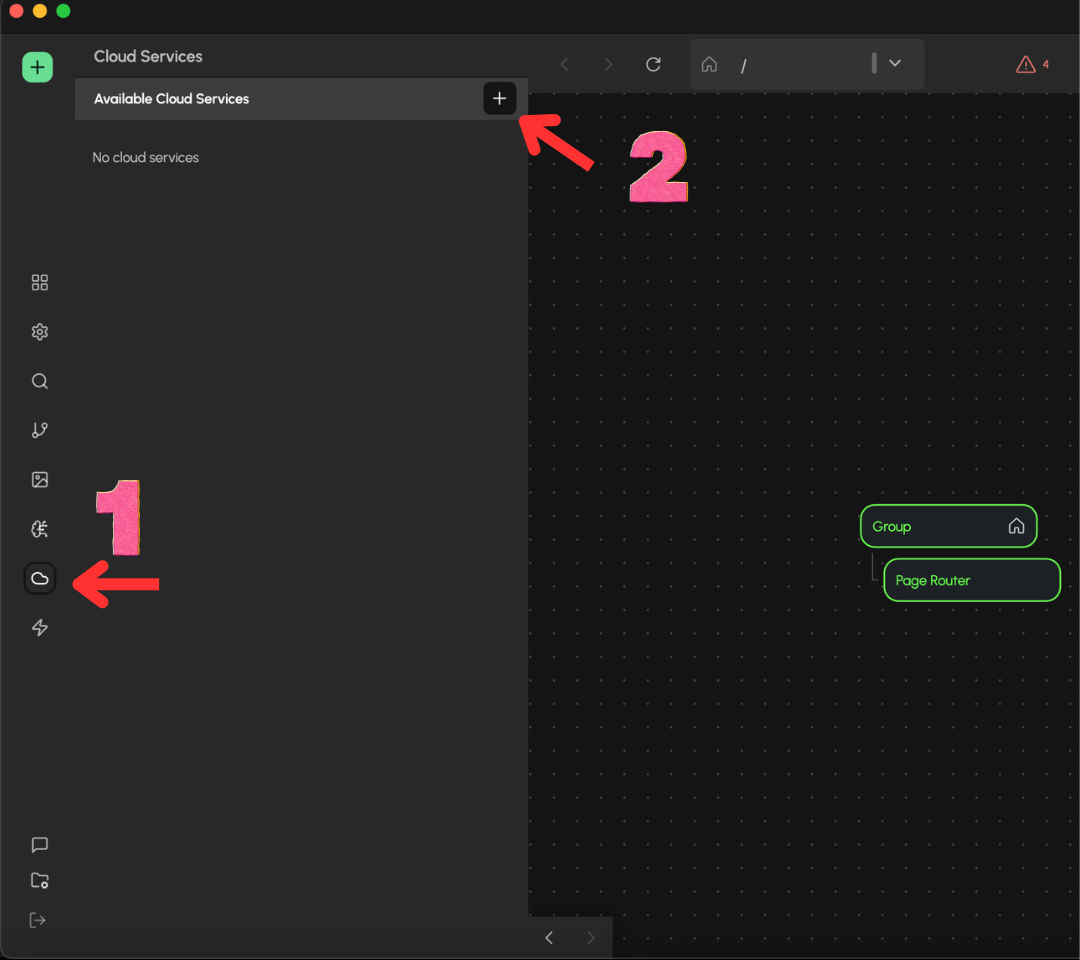
- Go to the Cloud Service panel in the left sidebar.
- Click the + icon next to Available Cloud Service.
- Enter your Supabase project details.
- Click Create Supabase Service.
Repeat the same steps to add a second service for your production environment.
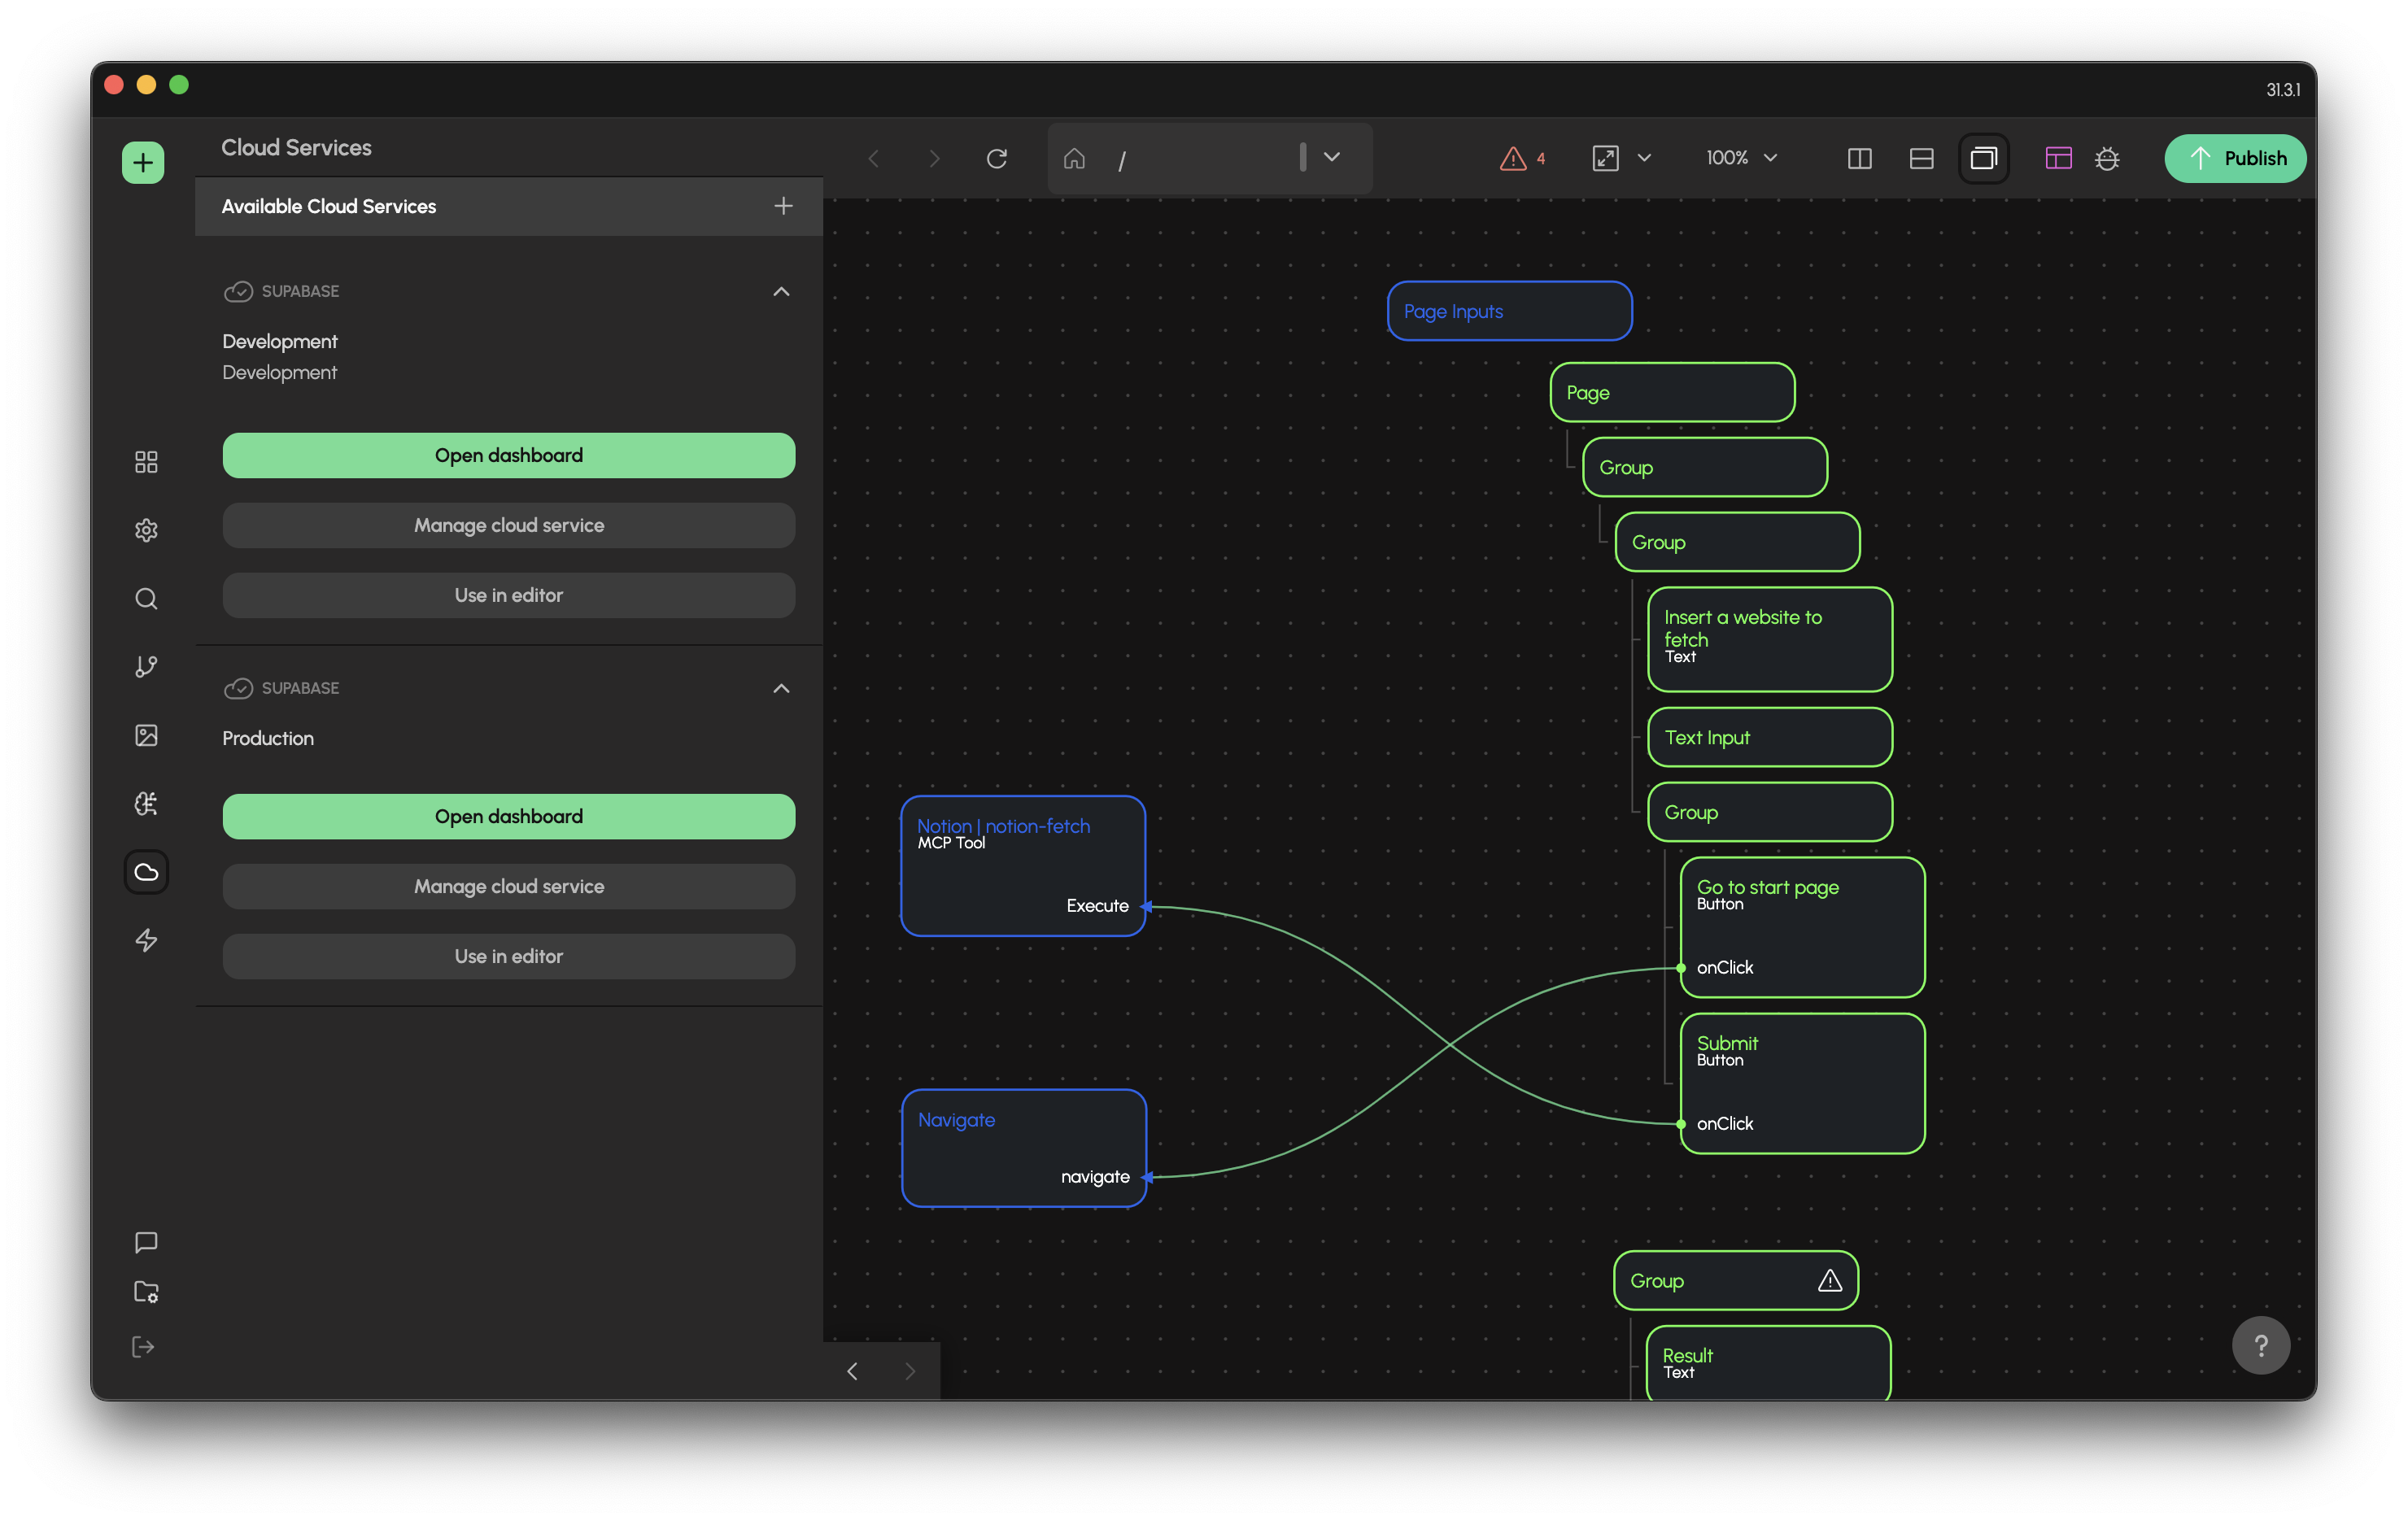
Once you add your cloud service, you can select whichever cloud service you like by clicking on the button that says Use in editor. This will apply the selected supabase project as the primary operational service in your project and when its time to switch to the other cloud service, you simply click on the Use editor without backend button and select the one you want to use again.